| The whole light box was constructed with Foam Core board that you can find at any craft store. I found some at a local convenient store in the School Supply section. I used Quilters Vellum as the light diffuser that I bought from a local sewing supply store. For the lights, I actually found a very short string of ten Christmas lights that ran from two "C" batteries. It was perfect and each strand only cost $2.50. Since they were inexpensive, I bought two extra sets for backup. Other construction materials used: Contact Cement, Duct Tape, Hot Glue Gun, Razor Knife. Since I would be imaging with two different telescopes, I made two boxes. One box for my refractor and a second for my LX200. It took two evenings to build both boxes. The total combined cost for me to build both boxes was ~$40-$50. I used a basic design I found from others on the internet, with my own adjustments. The whole premise around the design was to keep it as simple as possible with the lowest cost. |

| The Box: The box was cut with a straight edge using a razor knife. I then glued the panels together using a Hot Glue gun. I used contact cement to glue "Stop Tabs" on the inside of the box to hold the Base Assembly in place. I then taped all exterior edges with duct tape to add firmness and help block out light. |

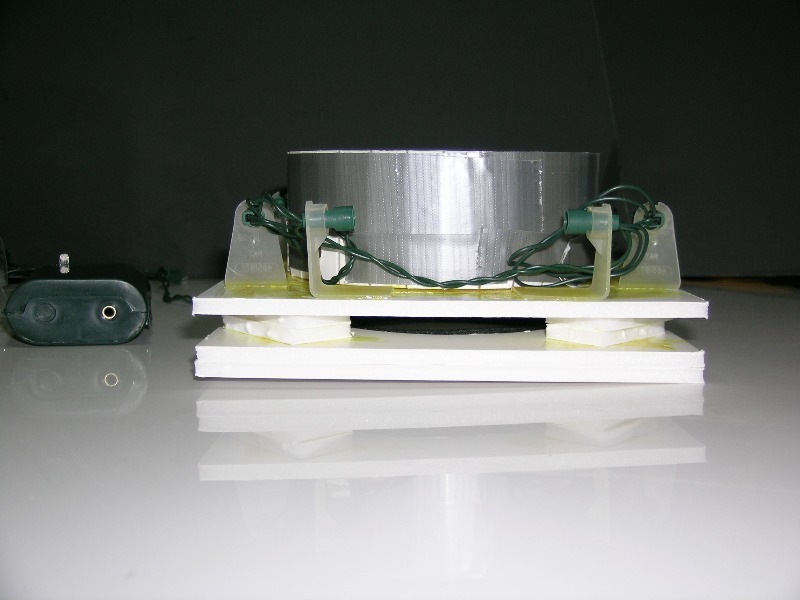
| Base Assembly: The whole base assembly was also constructed with Foam Board. X-mas light holders were then evenly glued in placed around the perimeter to mount the lights. I constructed a circular light baffle to block the side lights. This helps for a more evenly distributed light on the vellum. You can add or subtract light bulbs to adjust for brightness. |
| Side View: I built up the base assembly to provide additional "holding" surface when on the telescope. I made sure the light baffle was higher then the light bulbs. I then taped around the baffle for firmness and to block any possible stray light. The light brackets give me the ability to easily remove the light string if replacement in necessary. |

| Assembled Box: I simply slide the Base Assembly into the box, then slide the whole box assembly onto the scope. I lined the center hole with a strip of felt to help hold in place while on the telescope. Make sure to increase the hole diameter to allow for the felt. In my case, I increased the radius ~1/16". |

| Turned On: The picture is of the larger Light Box used for my 10" LX200. It gives a very evenly distributed light source. I can easily adjust the brightness by adding or subtracting a light bulb. For this picture, I used 4 of the lights. |

| Ready To Use: This picture shows the box in place on the Stellarvue AT1010 Telescope. It was designed so that it would fit while still "piggy backed" on the LX200. It simply slides on and is held in place by friction, since the whole box only weighs 9 oz., with the majority of the weight in the Base Assembly |

| Flat Field: This image was an averaged combined of 6 x 2 second light frames, minus the associated dark frame. Taken with the MX916. |

| Large Light Box: This is the Base assembly for the larger light box for the 10" LX200. The same design concept as the smaller one, only larger. As seen in the picture, I only used 4 light bulbs and removed the others. The light strand still works even with bulbs removed. |

| www.Stellar-Views.com |
| Amateur Astronomy |
| Flat Field Lightbox |
| [Click on Pictures to Enlarge] |